Oracle 12c release2 설치(2/2) Centos
3. 설치 화면
Configure Security Updates
첫번째 화면에서 I wish to receive security update…. 을 선택 해제 하고
Next를 클릭합니다.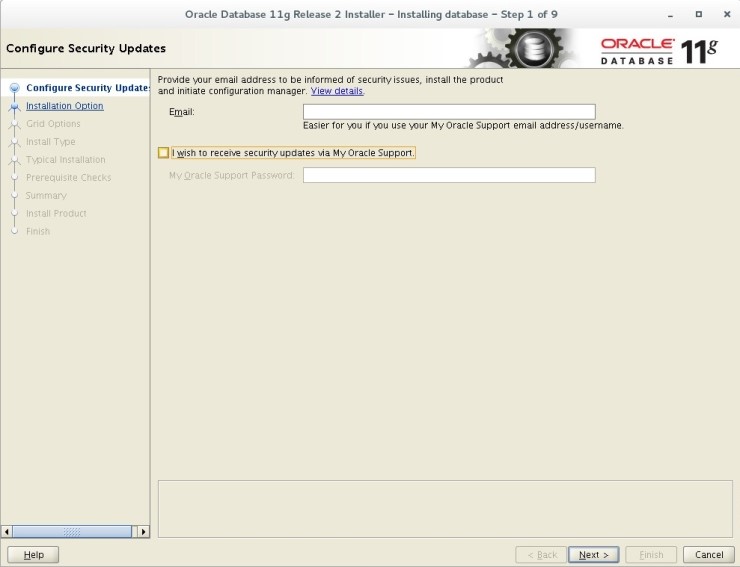
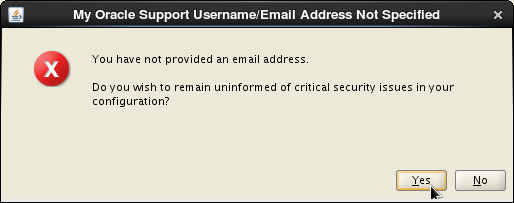
아래 팝업이 뜨면 Yes를 선택하고 설치를 진행합니다.
Installation Option
Create and configure a database 를 선택하고
Next를 클릭합니다.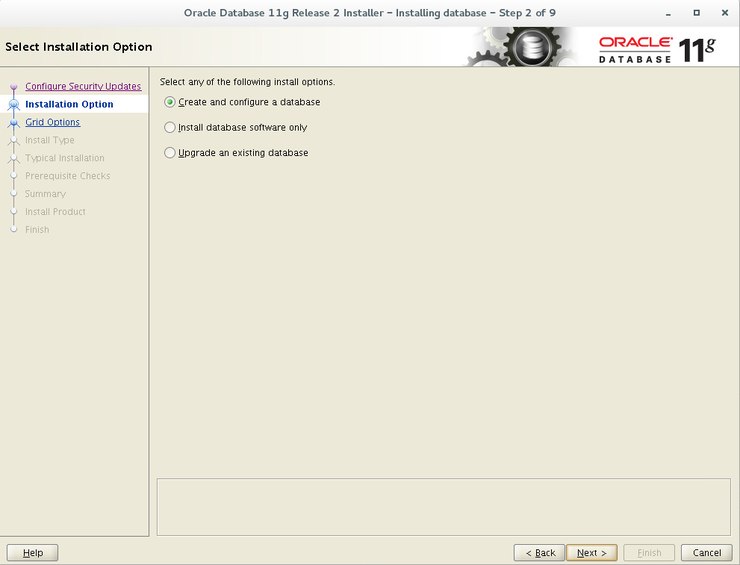
System class
Desktop Class 를 선택하고
Next를 클릭합니다.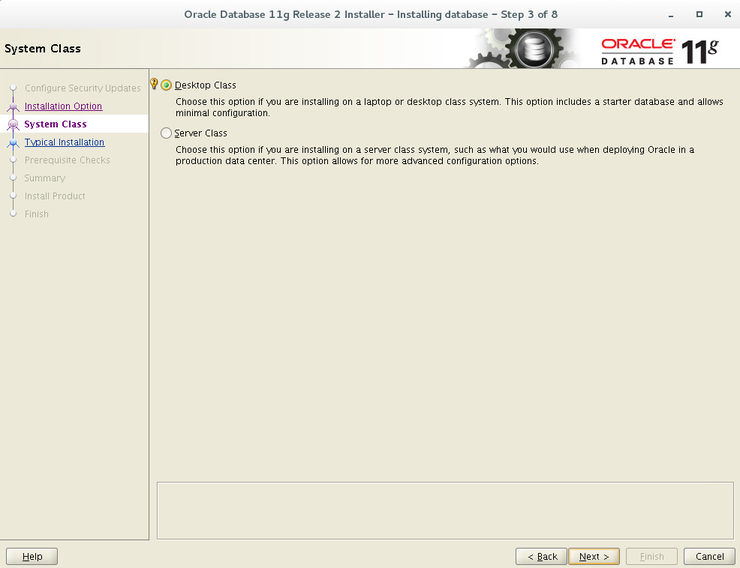
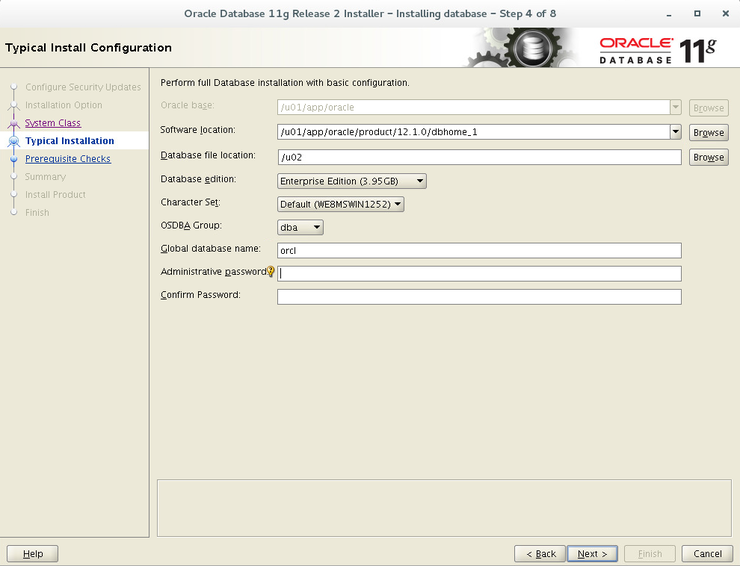
Typical Installation
다음 화면에서 여러 입력란이 있는데 각 란에 아래와 같이 입력합니다.
Oracle base /u01/app/oracle Software location /u01/app/oracle/product/12.1.0/dbhome_1 Database file location /u02 Global database name orcl.korea.com Oracle base = 오라클 최상위 디렉토리
Software location = 오라클 프로그램 파일 저장 위치
Database file location = DB과련 파일 저장 위치
Global database name = 디비 서버 이름
Administrative password 에 현재 설치하는 오라클의 관리자 비밀번호를 설정합니다. 가능하면 길게, 영문, 숫자를 섞어서 입력하시길 권합니다.
중요!!!!
Character Set 를 Unicode (AL32UTF8) 로 선택합니다. (Default 로하면 한글이 깨져요..)
입력을 마치고 Next를 선택합니다.
Create Inventory
Inventory Directory 가
/u01/app/oraInventory임을 확인하고Next를 클릭합니다.
Prerequisite Checks
이제 설치 프로그램이 자동으로 필요한 OS 패키지 및 OS 커널 설정을 확인합니다.
이미 설치가 되었다면 오른쪽에 있는
Ignore all을 선택하고 Next 를 클릭합니다.
Summary
마지막으로 설치 설정을 확인하고
Install을 선택합니다.
Execute Configuration Script
만약 request window 가 뜬다면 root 로 로그인 한 후 아래 두 명령어를 실행합니다.
1
2
3
4
5
6
7
$ /u01/app/oraInventory/orainstRoot.sh
Changing permissions of /u01/app/oraInventory.
Adding read,write permissions for group.
Removing read,write,execute permissions for world.
Changing groupname of /u01/app/oraInventory to oinstall.
The execution of the script is complete.1
2
3
4
5
6
7
8
9
10
11
12
13
14
15
16$ /u01/app/oracle/product/12.1.0/dbhome_1/root.sh
Performing root user operation.
The following environment variables are set as:
ORACLE_OWNER= oracle
ORACLE_HOME= /u01/app/oracle/product/12.1.0/dbhome_1
Enter the full pathname of the local bin directory: [/usr/local/bin]: <PRESS ENTER>
Copying dbhome to /usr/local/bin ...
Copying oraenv to /usr/local/bin ...
Copying coraenv to /usr/local/bin ...
Creating /etc/oratab file...
Entries will be added to the /etc/oratab file as needed by
Database Configuration Assistant when a database is created
Finished running generic part of root script.
Now product-specific root actions will be performed.
You can follow the installation in a separated window.
모든 설치 구성사항을 설정했습니다.
Installation progress가 뜨면 설치 설정이 완료 된것이고 설치 진행이 됩니다.
Installation progress가 끝나면 Oracle 12c r2 설치가 완료 된겁니다. 수고하셨습니다.